Turn off the water supply and depressurize the line. Verify your chlorinator certification matches your application (NSF/ANSI 61 & 372 for drinking water). Have the manual open beside you, along with the bypass schematic and bill of materials from Steps 2 and 3.

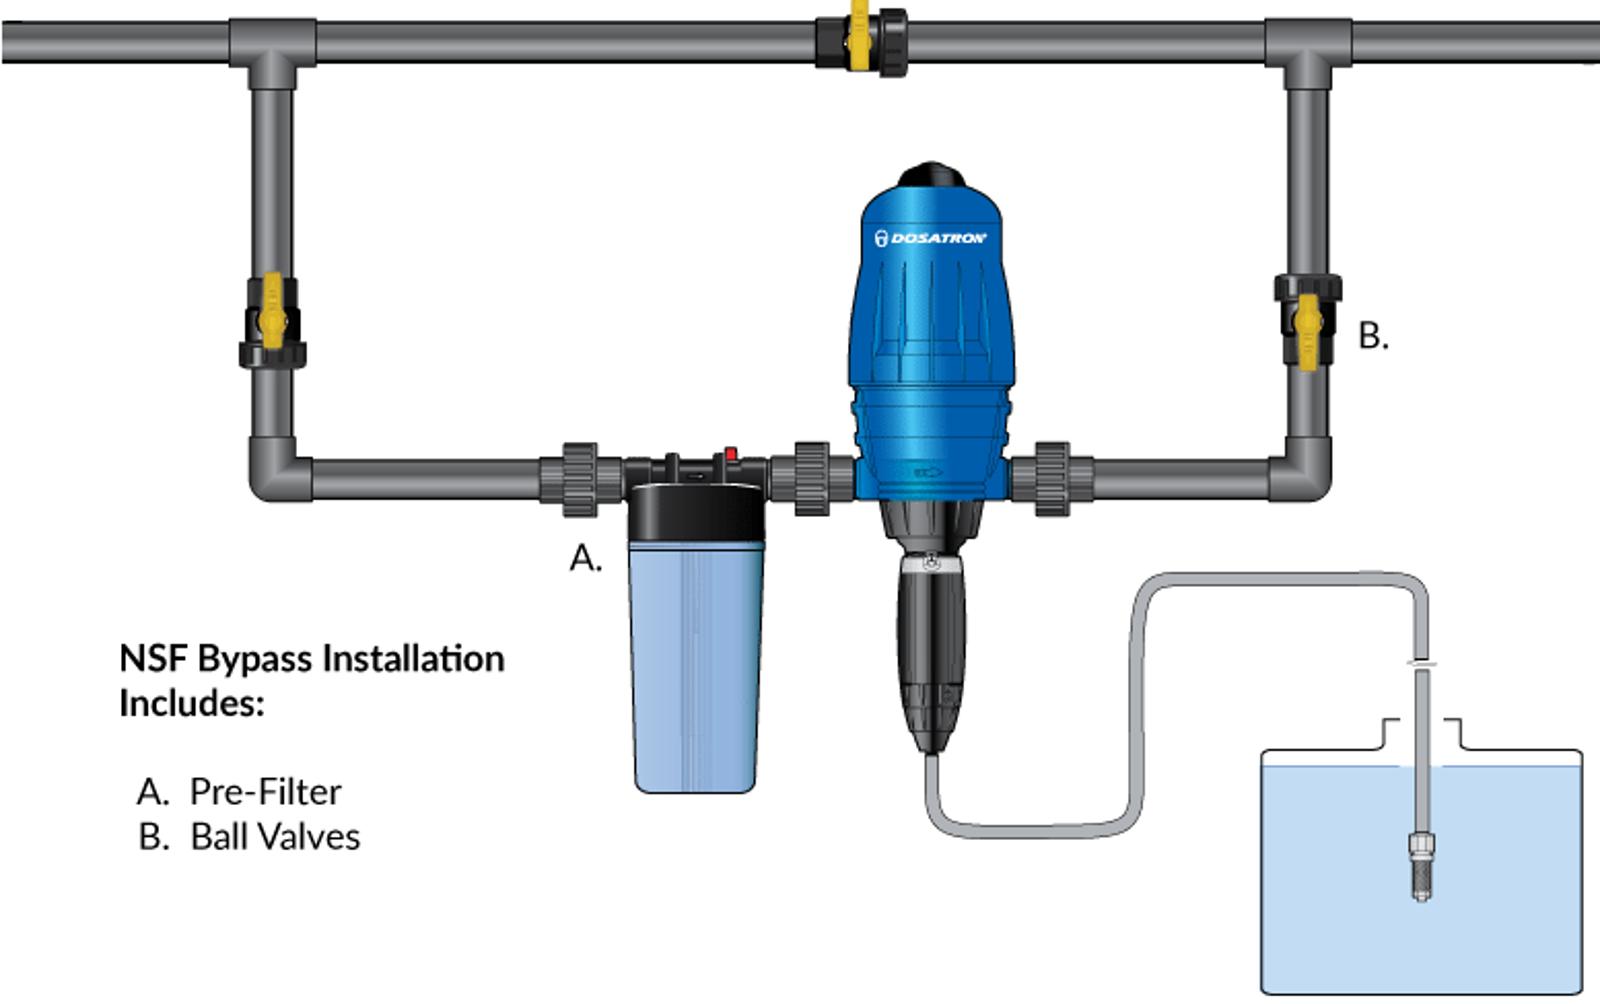
Installing a Dosatron chlorinator is a straightforward job — but a clean installation is what separates a system that runs trouble-free for a decade from one that fights you every winter. This guide walks through the planning, the bill of materials, the bypass schematic, and the step-by-step install for the D14WL and D40WL.
How to Install a Dosatron Chlorine Injection Pump
Common installation mistakes to avoid
- Installing the unit upside down or horizontally — must be vertical, arrows in flow direction
- Skipping the injection check valve — chlorine solution back-flows into the stock tank, ruining the seal kit and dosing accuracy
- Solution tank above the unit — the unit is designed to lift solution, not be flooded by it
- Using non-NSF thread sealant on potable water — disqualifies the install from NSF compliance
- No bypass valve — every service event requires shutting off water to the building
- Skipping the strainer — particulates plug the suction tube and stop dosing within weeks
After installation
Set a calendar reminder for the annual seal-kit service — this is the single maintenance item that keeps the unit running for a decade. For routine issues, see the maintenance and troubleshooting guide for the three most common chlorinator problems and their fixes.
Not Confident About Your Installation? Talk to Us First.
A conversation with a Dosatron specialist before you cut the line is faster, cheaper and safer than reworking a finished installation. Whether you have a question on bypass plumbing, NSF/ANSI 61 sealant compliance, suction tube routing or the bill of materials for your site, our team will walk you through the answer — and route you to the closest distributor or service centre if the installation calls for on-site support.